|
Easy-Cut
projects consist of one or more "clips".
One of Easy-Cut's unique
features is its ability to combine clips from more than one
Video File. Easy-Cut can even combine video clips from
different video files and formats into a new movie file.
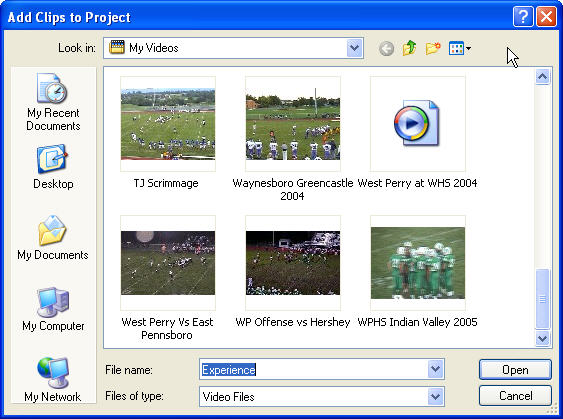
Click the ADD Clip button
on the Easy-Cut Toolbar to open the Select Movie File dialog
that is shown below.
This is where you will select one or more digital video files
(called clips) to add to your Easy-Cut project.
Easy-Cut
supports a number of video file formats, however best
results will be obtained when using .avi video
source files. In most cases, WMV files also produce
acceptable results.
The Open Movie dialog box enables you to select a
single video file by simply highlighting a Video
File and clicking Open. When you do
this, Easy-Cut assumes you have a video file that contains multiple "plays"
and therefore
displays the Video Editor Screen (shown below). At the top of the screen you
will see the name of the file you are viewing.
(Note: Versions 3 and later offer improved Video Editor data collection (tagging)
capabilities, including 6 Category drop down lists. Category labels can be
changed at any time, and affect only future projects).
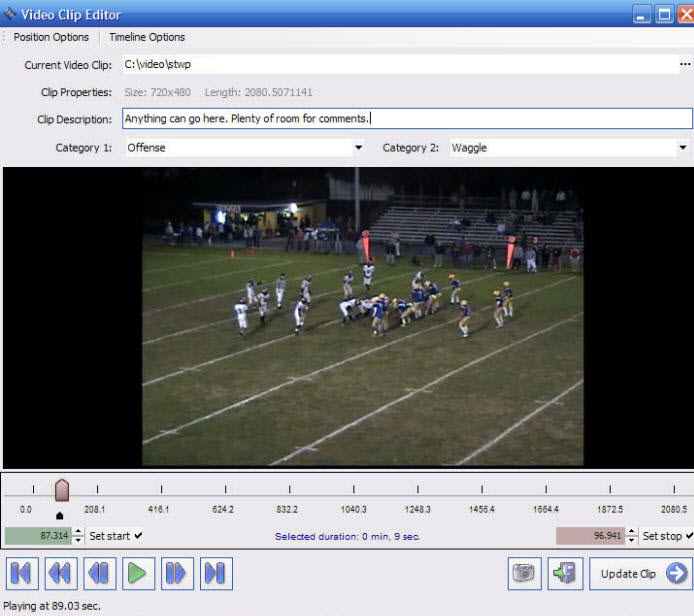
Easy-Cut Video Editing Screen
The Video Editing Screen
is used to watch video, "tag" clips and add them to an
Easy-Cut project. It consists of a Video Display area with
video counter in seconds, Set Start and Set End buttons, and
a "toolbar" for controlling video playback and "tagging
functions".
Clicking the Play button
starts the video. The Play button is a "toggle" between the
Play and Pause functions.
The process of adding
clips to an Easy-Cut project is as simple as clicking
Play/Pause, Set Start, Set End and Save. The > (Forward)
and < (Backward) buttons advance the video in 1 second
instruments and the >> and << either Fast Forward or Fast
Rewind. Clicking and Dragging the Green "Slider" enables
you to navigate through a video frame by frame.
The FILE OPEN button at
the upper right of the screen is used
to change video files. Easy-Cut will always remember
the video file that was last used with the project. To
select a new video file, click the ... icon to display the
Select Video File dialog.
Easy-Cut includes three (or seven in Versions 3 and later) "built in" tags that make it possible to record
information about the play, or clip.
The Description tag is a "free form" text
entry box, and two (six in Version 3) Category tags accept text entries while providing a
"carry forward" default value capability. A "carry forward" default
inserts the entry from the previous play. This is very useful when repeating
certain types of plays, for example.
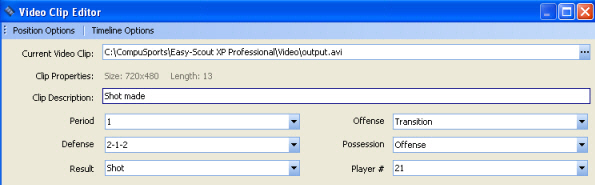
Easy-Cut Version 3 Video Editing Screen with more categories and
customizable labels The Category
drop down lists are automatically created
from the values used in the respective column in the active project. This
makes it possible to select a word or phrase from a drop down list or to use
the "quickfill" capability by typing the first few letters. Description and Category tags are visible in the Project
Grid and the Project Preview window to aid
in managing projects and performing selective playback on
one or more plays. In addition to the built-in tags, it is possible to
create as many custom tags as necessary for recording additional information
about each clip.
The UPDATE CLIP button is used
to add a video clip to the Easy-Cut grid.
The Screen Shot button
will take a picture of the video on the screen at the
current time, however it is "picky" about the pictures it
will take. If it can't make a snapshot of the image on the
screen, it will display a message to this effect.
The EXIT button closes
the Easy-Cut Video Editing and Tagging Screen and Returns to the Project
Grid.
|